


In order to monitor ETH transactions, we need an Ethereum node. We can use one provided by Infura for free. You just need to sign up infura.io and create a new project.

From the project settings, we will need our http provider:
- ex:
https://ropsten.infura.io/v3/775214aeabb642a5b93e138293d83a1e
You will need to change 775214aeabb642a5b93e138293d83a1e with your project id.
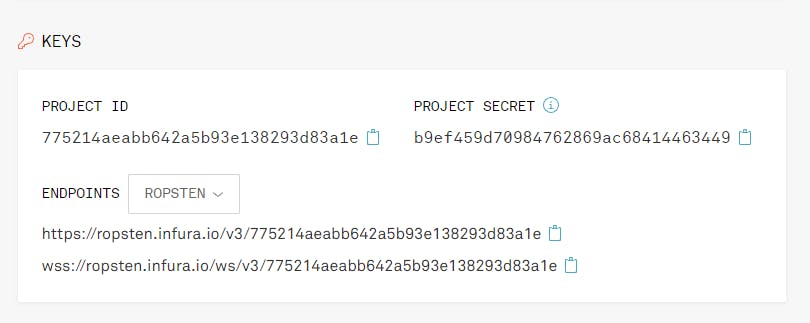
Don't worry, I deleted the project so the keys from the picture will not work 😀. Get your own keys.
Now, let's install web3 and node-cron with the following command:
npm install web3
npm install node-cron
Monitor Ethereum class
After that, create a file monitor.js and paste the following code:
const Web3 = require("web3");

class MonitorEth {
  constructor(httpProvider) {
    this.web3 = new Web3(new Web3.providers.HttpProvider(httpProvider));
    this.lastSyncedBlock = null;
  }

  async initializeLastSyncedBlock() {
    this.lastSyncedBlock = await this.getLastBlockNumber();
  }

  async getBlock(blockNumber) {
    return this.web3.eth.getBlock(blockNumber, true);
  }

  async getLastBlockNumber() {
    return this.web3.eth.getBlockNumber();
  }

  async searchTransaction(to) {
    const lastBlock = await this.getLastBlockNumber();
    console.log(`Searching blocks: ${this.lastSyncedBlock + 1} - ${lastBlock}`);

    for (
      let blockNumber = this.lastSyncedBlock + 1;
      blockNumber < lastBlock;
      blockNumber++
    ) {
      const block = await this.getBlock(blockNumber);

      if (!block?.transactions) {
        continue;
      }
      for (const tx of block.transactions) {
        if (!tx?.to) {
          continue;
        }
        if (tx.to.toLowerCase() === to.toLowerCase()) {
          console.log(tx);
        }
      }
    }
    this.lastSyncedBlock = lastBlock;
    console.log(
      `Finished searching blocks: ${this.lastSyncedBlock + 1} - ${lastBlock}`
    );
  }
}

module.exports = MonitorEth;
In the constructor, we create our Web3 instance in order to interact with the Ethereum chain. Also, we created a method that will initialize our app and will save the last block number that we scanned. ( Probably, you will save this in your database in order to not lose it if your app goes down ).
After that, we created 2 methods that we need in order to get more information from the chain:
- getLastBlockNumber -> Will fetch the number of the last block mined.
- getBlock -> Will fetch the block information from the node and it will contain all the transactions present in that block.
And at the end, the method searchTransaction. This gets the block data from the chain between our last synced block, and the current last block from the chain, and checks if there is any transaction that matches our to address -> with the following condition: tx.to.toLowerCase() === to.toLowerCase()
Main script
Now, let's create our main script app.js.
First, we need to import node-cron and our monitor class.
const cron = require("node-cron");
const MonitorEth = require("./monitor");
After that, we need our endpoint from Infura and the address that we want to monitor.
const httpProvider =
  "https://ropsten.infura.io/v3/775214aeabb642a5b93e138293d83a1e";
const to = "0xd8588cc99979a961De7f2Ca3532477A4221BFb79";
The last thing we need to do is create an instance of our monitor class, initialize the last block, and create a cron.
const cron = require("node-cron");
const MonitorEth = require("./monitor");

const httpProvider =
  "https://ropsten.infura.io/v3/775214aeabb642a5b93e138293d83a1e";
const to = "0xd8588cc99979a961De7f2Ca3532477A4221BFb79";

async function main() {
  try {
    const monitor = new MonitorEth(httpProvider);
    await monitor.initializeLastSyncedBlock();
    console.log('Looking for transactions...')

    cron.schedule("*/2 * * * *", async () => {
      console.log('Cron started.')
      await monitor.searchTransaction(to);
      console.log('Cron finished.')

    });
  } catch (error) {
    console.log(error);
  }
}

main();
Here, our cron will be fired every 2 minutes. If you want to learn more about cron times, you can check crontab.guru.
After that, you can just start it with node app.js and make a transaction to your to address.
Here it is an example of what it will look like:
$ node app.js
Looking for transactions...
Cron started.
Searching blocks: 12451460 - 12451563
{
  accessList: [],
  blockHash: '0xb0df4a27e1c77df495a32324650e06e9fa8138c8f9a3910fb3562b4156d5f37c',
  blockNumber: 12451460,
  chainId: '0x3',
  from: '0xeE1D1D01A7a5fCa456006b0458693723E61427f6',
  gas: 21000,
  gasPrice: '227691906143',
  hash: '0xaf96ccf776e47adf8f8724f3222bb9068d5287c9bc50bd69d2bf3fa90e3889c1',
  input: '0x',
  maxFeePerGas: '257616117457',
  maxPriorityFeePerGas: '38800000000',
  nonce: 24,
  r: '0x59946a27e3d0c452843b9780c8072ca17f81bce410430a722013a6a08084d7f9',
  s: '0x4be019582ba83865bbc28790ff26ec767ae2bbcb6e610947ea00ba17d5d01de9',
  to: '0xd8588cc99979a961De7f2Ca3532477A4221BFb79',
  transactionIndex: 2,
  type: 2,
  v: '0x1',
  value: '10000000000000000'
}
Finished searching blocks: 12451564 - 12451563
Cron finished.
Cron started.
Searching blocks: 12451564 - 12451567
Finished searching blocks: 12451568 - 12451567
Cron finished.
Cron started.
Searching blocks: 12451568 - 12451572
Finished searching blocks: 12451573 - 12451572
Cron finished.
Cron started.
Searching blocks: 12451573 - 12451577
Finished searching blocks: 12451578 - 12451577
Cron finished.
In the above example, I made a transaction of 0.01 ETH that you can check
here.
As you can see, the value is actually 10000000000000000 because that is in WEI, not ETH. You can find the ETH value by using: eth-converter.com.
And, that's it. Now you can monitor incoming transactions to one of your addresses. 🎉🎉🎉